
Router Firmware Version
DrayTek Vigor Routers

|
Router Firmware VersionDrayTek Vigor Routers |

|
Your router is a computer; a specialised computer of course, but just like your desktop PC, it contains a processor, RAM, ROM and i/o facilities (ports). Also, like your desktop PC, it contains its own operating system (DrayOS) and the runtime program (firmware) which performs the routing and other functions of the product. The O/S and the current firmware is stored in non-volatile RAM (non-volatile means that the memory is retained when powered down). Another example of NVRAM is that used in digital camera memory cards.
By upgrading the router's firmware, you can add new features/facilities to your existing product. New firmware can also be provided to improve or change existing operation or features of your router. The process of loading new firmware is known as 'reflashing' (as the NV-RAM is also known as 'flash RAM'). You can also re-load the same firmware version that you already have installed if you want to 'start afresh' and clear out all existing settings, or in the event of a problem (see later).

Firmware should be upgraded using the Firmware Upgrade Utility which is supplied on CD with your router (as part of the router tools). The latest version of the tools is also normally included in the firmware files that you can download from the web site; always ensure that you obtain the correct firmware version for your exact router model and country.
If you download firmware, it is normally provided inside a compressed 'ZIP' file. This ZIP will typically contain the following files :
In later models, e.g. Vigor 2820, you do not need to use the firmware upgrade Utility; you can upgrade from the router's own web interface (System Maintenance -> Firmware Upgrade). Use the browse button to locate your firmware file on your local PC and then select upgrade:

|
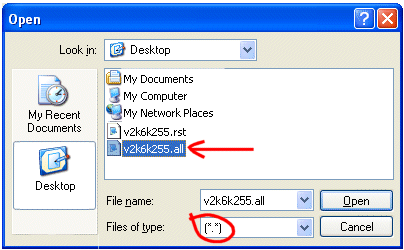
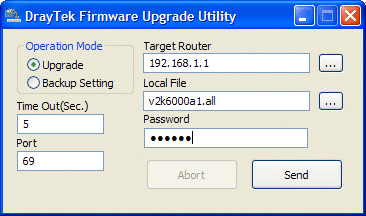
The firmware utility is contained within the Router Tools (on your CD Rom or download from this page). The firmware upgrade program requires you to enter the firmware's filename (which you can browse for) and the admin password for the router (if set). If you browse for the firmware file ensure that you have already unzipped the firmware files (.all and .rst). By default the browse will look for the 'all' file so remember to change the 'file type' selector if you want to use the RST file (see image, right). You also need to enter the router's IP address; if you're not sure what that is, you can press the ... button to locate it. |
|
|
Once you press 'send' the utility will automatically enable TFTP mode on the router (a special mode in which it can receive the file) and then send the file. During TFTP mode, the first two LEDs on the left flash together. If you have a wireless router, you must use a wired PC (RJ45/Ethernet) to do the firmware upgrade - you cannot reflash firmware over the wireless interface. |
|
After sending the firmware file, the router will write its new firmware to the flash memory and then reboot. This can take typically around 60 second after the file has been sent. It is very important that you do not disturb the router during this time. Once the firmware has been written and the router rebooted, the ACT LED will flash on its own normally again.
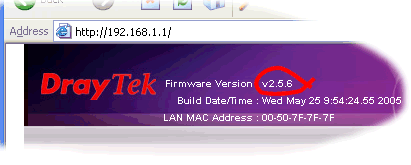
Your router is now reflashed. If you have upgraded to a new firmware version, the front page of the web configurator will now confirm the new firmware version, at the top right-hand-side of the screen.
The .ALL file contains the router's firmware. If you flash the .ALL file, the router should retain all of its existing settings and after it has flashed and rebooted will resume normal operation automatically. Never change the filename or attempt to alter/edit the firmware file.
If you are making a major firmware upgrade (for example where the first digit changes, say 1.5 to 2.6), or where the readme.txt notes recommend it, you should use the RST file which will clear all existing router settings. The RST file is also necessary if your router has corrupted firmware, or invalid settings which cause it to malfunction. A firmware corruption should not occur during normal usage but can occur if the router is subject to abnormal trauma (e.g. power/line spike or brown-out). Firmware or settings abnormalities can also occur if you have attempted to flash an invalid firmware file into the router, or tried to restore settings from an incompatible model/device. Reflashing the correct RST file will restore the router's firmware and also the 'factory default' settings of the router, wiping all existing settings. The unit must then be re-configured from scratch. Do not attempt to restore backed up settings from a file if the backup file was taken from a router with corrupt/invalid settings.
|
If you gets a "request time out" message after pressing send, check that the PC's own IP address is in the same subnet as the router (e.g. 192.168.1.10 and 192.168.1.1 for the router). Also be sure that you have temporarily removed any software firewall on the PC which might be interfering with the upgrade procedure. If the procedure appears to complete, but then the router remains in TFTP mode (both left hand LEDs flashing together) for over 2 minutes, turn the router off/on and then try the procedure again. |

|
If for some reason the router is not running normally (e.g. ACT is not flashing normally) and the router cannot be reached from telnet or the web browser, then the firmware upgrade utility may not be able to enable TFTP mode itself. Additionally, in the case of invalid settings or corrupted firmware the router may put itself automatically into TFTP mode when booted. This 'boot loader' mode is stored in a special permanent memory area (ROM) which cannot be erased by the user, so even if the main firmware is completely corrupted, boot loader mode should still be accessible.
If the router is in TFTP mode, either of its own accord, or because you manually enabled it (see below) you must use the TFTP Client Utility instead of the regular Firmware Upgrade utility. The TFTP Client program can be downloaded from the web site.
 | If you need to enable TFTP mode on the router manually, do as follows : Turn OFF the router (use the power switch or remove the power plug). Using a ballpoint pen, press and hold the Reset button on the rear of the router. You do not need to press hard; you will feel the button gently click. Whilst still holding the button pressed, turn the router back on. You can release the button once you can see TFTP mode is enabled frfom the LEDs (that should be almost immediately) When TFTP mode is enabled, the first and second LEDs will flash together as shown on the left. |
Once the router is in TFTP mode, you can run the TFTP client :
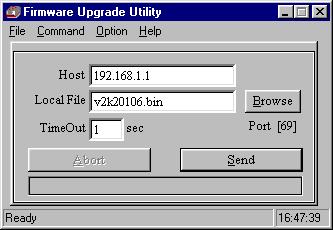
If you have changed the router's IP address, try that IP address first. If that doesn't work because settings are corrupted, the router will revert to the default address of 192.168.1.1.
When in TFTP mode, the router's DHCP facility does not operate normally so the uploading PC must already have an IP address (either from DHCP earlier or manually set) and that address must be within the same IP subnet as the router's IP address. You cannot ping or access the web config screens when TFTP mode is running and the wireless interface (if applicable) won't function, so you must do the upgrade from a wired PC. The router will automatically enter TFTP receive mode if its firmware has become corrupted. If you enable TFTP mode accidentally, just turn the router off and on again and it will boot normally (except in the case of firmware corruption or mismatch).
For the Vigor2000 only (which does not have a Reset button), you must first enable boot TFTP mode from the console port menu; you will need the serial console cable (supplied) and use Windows Hyperterminal (or similar). Once boot TFTP mode is enabled, you use the TFTP client utility as with other models to send the firmware over the Ethernet interface. If you have very old Vigor2000 firmware in your router still (version 1.3 or older) and cannot reflash it, please contact your dealer for assistance.
This facility it depends on the model and firmware already installed. On some models, you can update the firmware from another location, via the WAN (public-facing) interface - i.e. without having to be at the same location as the router. Firstly, you must enable the facility from the router's management menu :
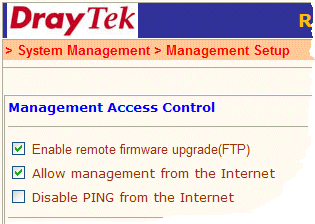
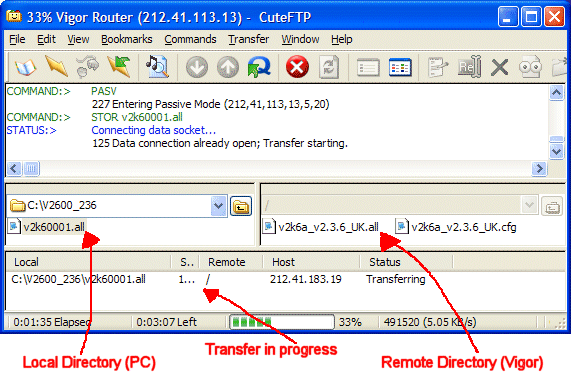
Then, using any FTP (not TFTP) program (we used CuteFTP in the example below) you can open an FTP connection to the router's public (WAN) IP address, using the username 'admin' and the admin password you have set on the router. A regular directory will appear as per the example shown below and you can now transfer the appropriate firmware .ALL file. After receiving the file, the router will write it to its flash rom; this can take a couple of minutes. Do not disturb the router during this time. It will reboot once it has written the new firmware, and the router should be back online shortly.
We do not recommend sending the .RST file as that will then clear our the router settings and the router will not be able to log back onto the line, so you will not longer have access to it until someone configures it locally.
After the upgrade, the router configurator main page should then show the new firmware version is installed into the router.
NOTICE : This document is © SEG Communications and may not be distributed without specific written consent. Information and products subject to change at any time without notice.